Installation on WordPress
If you have a website hosted on WordPress, you can be up and running in minutes leveraging our WordPress plugin.
Prerequisites
Before proceeding, ensure that you have:
- Administrative access to your WordPress website.
- WordPress version 4.6 or higher installed.
Installation
Method 1: Installing via WordPress Admin Panel
-
Access WordPress Admin: Log in to your WordPress admin dashboard.
-
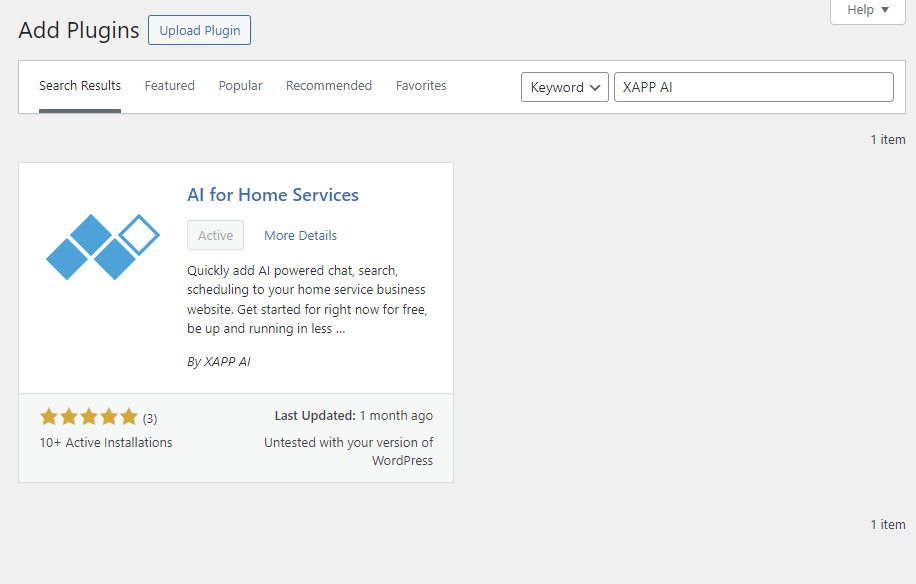
Navigate to Plugins: On the admin sidebar, click on
Plugins > Add New. -
Search for "XAPP AI": In the search field, type
XAPP AIand press Enter.
-
Install the Plugin: Locate
AI for Home Servicesin the search results and click onInstall Now. -
Activate the Plugin: After installation, click on
Activateto enable the plugin on your WordPress site. -
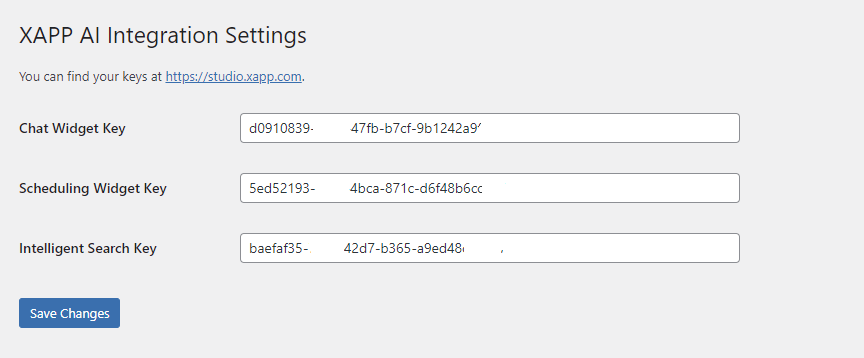
Configure the Plugin: Navigate to AI for Home Services settings from the WordPress admin side by: "Tools" --> "XAPP AI Settings"
-
Paste in your Keys: For each key, you will need to copy paste your keys from each channel.
-
Save Changes: After saving your changes, your configured widgets should appear.
Method 2: Manual Installation via FTP
-
Download the Plugin: Visit AI for Home Services Plugin Page and download the latest version of the plugin.
-
Unzip the Plugin: Extract the downloaded
.zipfile to a folder on your computer. -
Upload via FTP: Using an FTP client, upload the extracted plugin folder to the
/wp-content/plugins/directory on your WordPress server. -
Activate the Plugin: Log in to your WordPress admin dashboard, navigate to
Plugins, and findOC Studio Integrationin the list. ClickActivate.
Configure the WordPress Plugin
We will need to configure the plugin with the special keys for your chat and search (optional) widgets.
Within the WordPress Admin panel, navigate to the new OC Studio Settings page found under the Tools settings. The same settings page can be found under Settings -> XAPP AI.
Find the keys within studio, and paste them into your plugin configuration page.
- How to Find the Chat Widget Key
- How to Find the Intelligent Search Key
- How to Find the Form/Scheduling Widget Key
A completed plugin configuration will look like the follow:
The chat widget will not appear, by default, in the lower right hand corner of every page on your website.
Setting Up a Search Button
In order for the search widget to be trigger, you will need to setup at least one button with the xapp-search-button class setting.
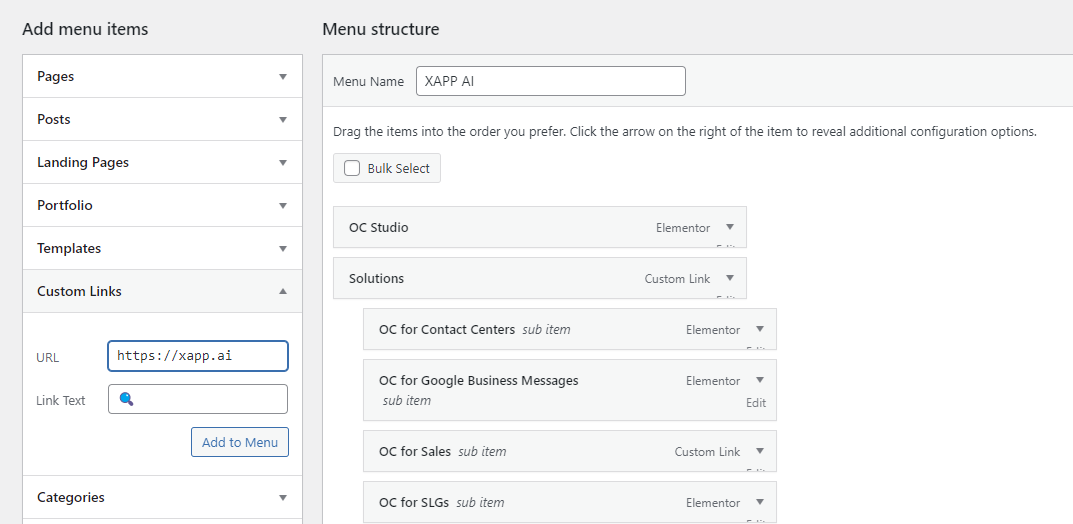
Menu Item
The most straight forward way to add a search bar button is by a menu item.
-
In your WordPress Admin panel, go to Appearance, then Menus.
-
Select the menu you want to edit
-
Under "Add menu items, expand "Custom Links"
-
The URL does not matter as it will not be followed but is required, for the Link Text you can put "Search" or "🔍".
-
Click "Add to Menu" and you will see it at the bottom of the menu you are editing.
-
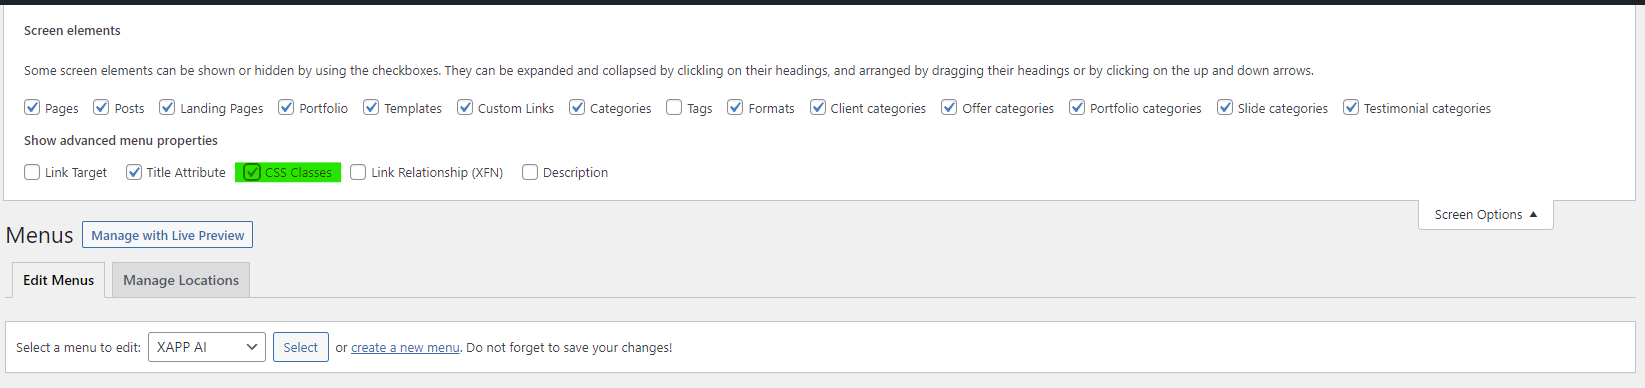
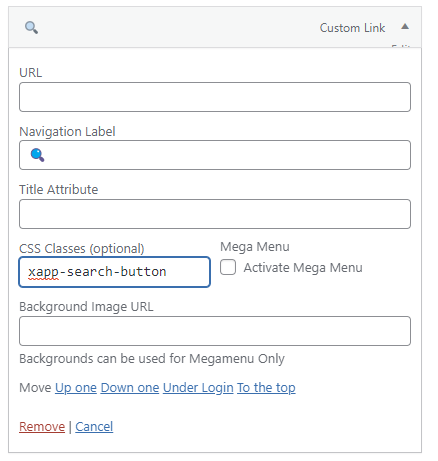
Scroll to the top of the page and click "Screen Options", then within that menu select "CSS Classes"
-
Scroll back down to your newly added menu item and expand menu to edit. In the field "CSS Classes (optional)" add "xapp-search-button". This is how the search code will find the button. Note: You can also remove the URL at this point if you want. It was only required to add the menu item.
-
Save and then verify by clicking on the new menu button on your home page. A search widget will appear when you click.
Troubleshooting
If you encounter issues during installation, check the following:
- Ensure WordPress is up-to-date.
- Confirm that you have administrative privileges.
- Check for plugin compatibility with your WordPress version.
- For manual installations, verify that the plugin files were uploaded correctly.
For additional WordPress support, visit the plugin's OC Studio Integration Support Forum.