Installation on Squarespace
Note: In order to install custom widgets on your Squarespace site, you need at least the Business tier, see the Squarespace pricing here
This guide will assist you in adding the XAPP Chat Widget to your Squarespace website using a JavaScript snippet.
Prerequisites
- Administrative access to your Squarespace account with at least the Business tier.
- Your unique
keyfor the XAPP Chat Widget.
Installation Steps
-
Access Your Squarespace Website
- Log in to your Squarespace dashboard.
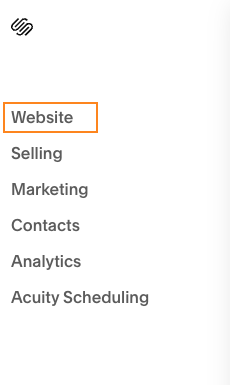
- Navigate to
Website.

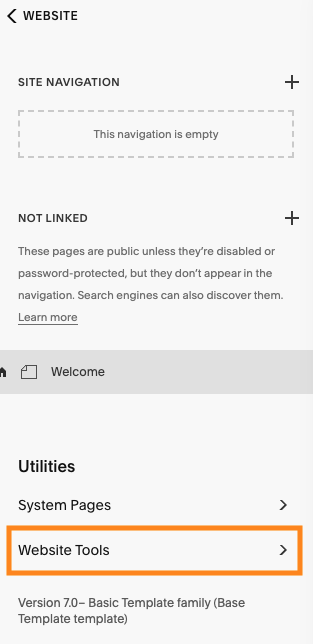
- Select Pages

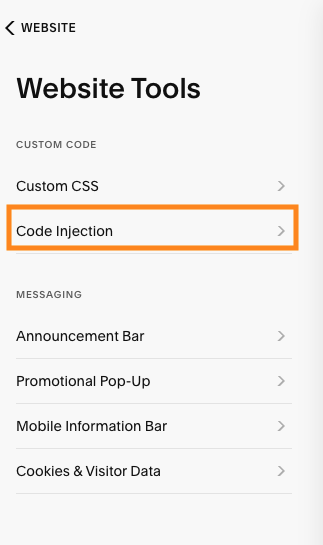
- Select Utilies -> Website Tools

- In the Custom code section, select Code Injection

-
Insert the JavaScript Snippets in Code Injection
-
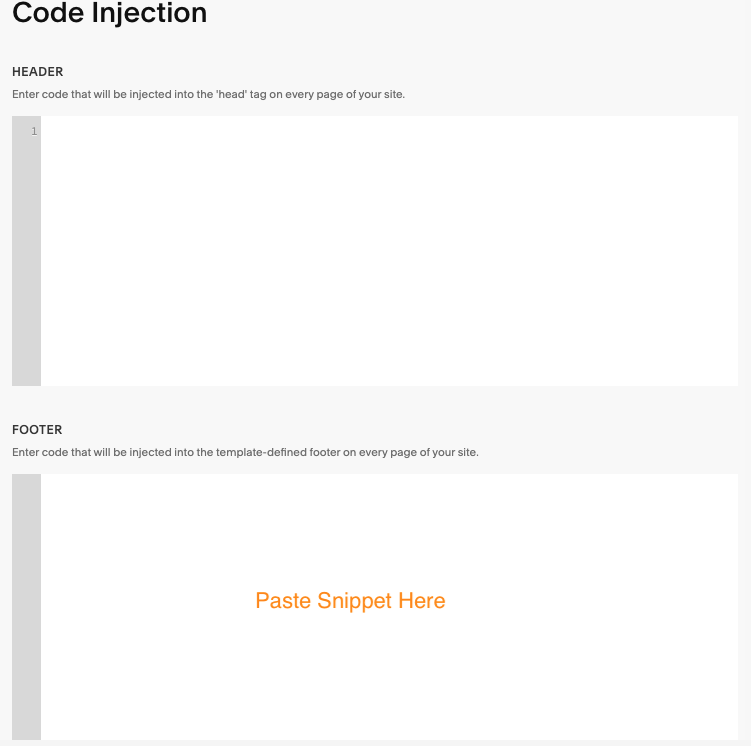
Click on
Code Injection.
-
In the
Footersection, paste the following snippets:
Chat Snippet
<script
  id="xapp-js"
  src="https://widget.xapp.ai/xapp-chat-widget.js?key=YOUR_CHAT_KEY"
></script>
Note! Please replace "YOUR_CHAT_KEY" with your actual widget key.
Form / Scheduler Snippet
<script
  id="xapp-form-js"
  src="https://form.xapp.ai/xapp-form-widget.js?key=YOUR_FORM_KEY"
></script>
Note! Please replace "YOUR_FORM_KEY" with your actual widget key.
Search Snippet
<script
  id="xapp-search-js"
  src="https://search.xapp.ai/xapp-search-bar.js?key=YOUR_SEARCH_KEY"
></script>
Note! Please replace "YOUR_SEARCH_KEY" with your actual widget key.
importantFor the search bar, you will also need to setup a button on your website to trigger the search bar pop over, please see these instructions.
-
-
Save Your Changes
- Click
Saveto apply the changes.
- Click
-
Verify Installation
- Refresh your website to ensure the XAPP Chat Widget is visible and functional.
Troubleshooting
- Widget Not Appearing: Confirm that the code was entered correctly and in the
Footersection. - Functionality Issues: Check for any JavaScript errors in your browser's console.
For additional support or queries, contact XAPP support.